- Please read this manual carefully before installation.
- Please also refer to the FORD Service Manual in conjunction with this manual.
- After the installation has been completed, please keep this manual for future reference.
- If the installation was done in a shop, please make sure to give this manual to the owner.
Kit Contents
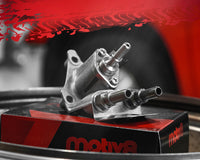
- EGR tube
Required tools
- FORD workshop service manual
- Mechanic’s tool kit
Caution
- This product was designed specifically for the application specified. If an attempt is made to use this product on another car other than specified, you will risk damaging this part and components related to it.
- Please have regular maintenance checks to ensure the item remains securely fitted.
- Do not use any excessive force when using this product as you risk damaging the product or other parts.
- This product must be installed with the appropriate tools and equipment to prevent any electrical failures, injuries, or bodily harm.
Installation
Preparing for replacement:
- Park your vehicle.
- Engage the parking brake to keep the wheels locked. Ensure your vehicle will not move. Shut off the engine and ignition, and remove the key from the ignition switch.
Replacement
- Remove the engine cover.
- Remove any air filter and coolant lines as needed. Sometimes the coolant lines will be blocking the EGR tube as well. Remove any of these lines using the instructions in your vehicle's service manual. If you have coolant lines on top of the engine, make sure you drain the coolant in the radiator below the coolant tube before removing the coolant lines. Use your designated coolant container to hold the coolant while you continue the repair.
- Locate the EGR valve and remove the electrical harness and any other sensor connections attached to the EGR tube. Mark each sensor’s location with tape or some other identification method to ensure you can correctly reinstall the sensors later.
- After all electrical lines have been removed, spray some penetrating oil onto the nuts and bolts that connect the EGR tube to the EGR valve and other parts. This will loosen them and allow you to remove the tube without stripping the nuts or bolts.
- After the bolts have soaked for about 5 minutes, remove the bolts connecting the tube, disconnect the EGR tube, and remove it from the vehicle.
- Clean the EGR valve. Using carburetor cleaner, soak a shop rag and clean the port on the EGR valve that connects to the EGR tube. There will probably be buildup of carbon inside this port, so it's recommended to clean it before installing the new tube.
- Replace gaskets onto the EGR tube if needed.
- Install the new EGR tube and tighten down the nuts or bolts in the reverse order.
- With the new tube now in place, plug the electrical connector and any other sensors previously removed back into the EGR tube and EGR valve in the reverse order.
- If you previously sprayed penetrating oil on the connecting bolts to loosen them up, you should now spray them with carburetor cleaner and wipe them clean with a clean, dry shop rag. This will remove any residual oil from the bolts and reduce the potential of them burning when the engine starts up again.
- Reattach the engine cover and any coolant lines, air filters, or any other additional parts in reverse order.
- Refill the radiator up to the recommended coolant level if you had to remove any coolant lines.
If you do not feel confident doing the job yourself, have a certified technician perform the replacement.
If you need to buy a new EGR Tube, sensor, then you can do it in our online store here: Exhaust Gas Recirculation Sensors – MOTIV8 Engineering (motiv8parts.com)


